|
Readalistic A web site for your book club |
Help Page
Basic Controls Available to Anyone
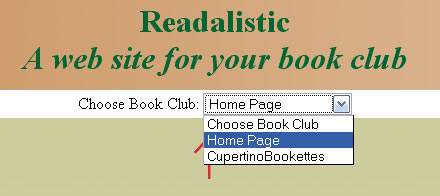
Basic control of the site is simple as is data entry and editing. First thing to do is select the book club that you want to see. This is done with the pull-down menu in the top center of the page as shown in the following image. If your club is not present then someone will have to go to the "Home" page (chosen by the select menu or the "Home" link on the left) and create an account. Once this is done, screens shown below can be used to enter data.
The following image shows the control for picking what year you want to see and gives an example of club-specific links that can be easily added by the person with administrative privileges (the person who openned the account).

Administrator Controls
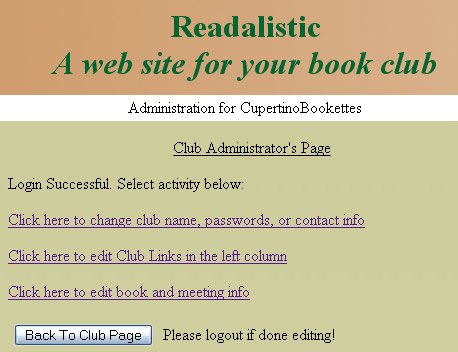
Once an account has been created via the link on the home page, the "Club Administrator" link can be clicked on the left of the main page for the desired club and the administrator password used to log in. This will bring up the following page. There are three options from here - account control changes (password, etc.), entry and editing of club links, and entry and editing of book and meeting info. Click one of the links to proceed.
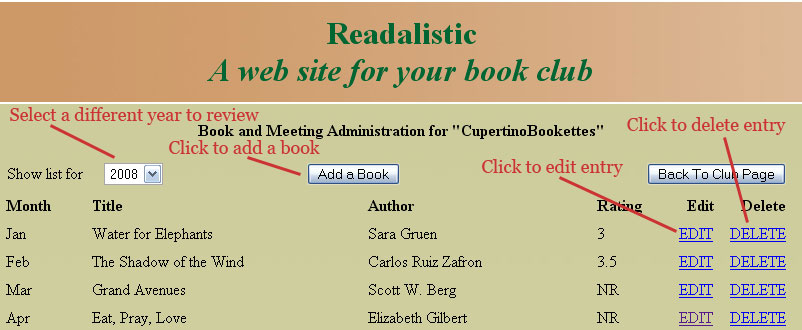
The following image shows the book and meeting listing that will be presented if the last link is clicked from the previous screen. Here you will be able to add a book, edit a book/mtg entry, delete an entry, and look at the list for a different year. Use the "Back to Club Page to log out of this control page and return to the main listing when you are done.
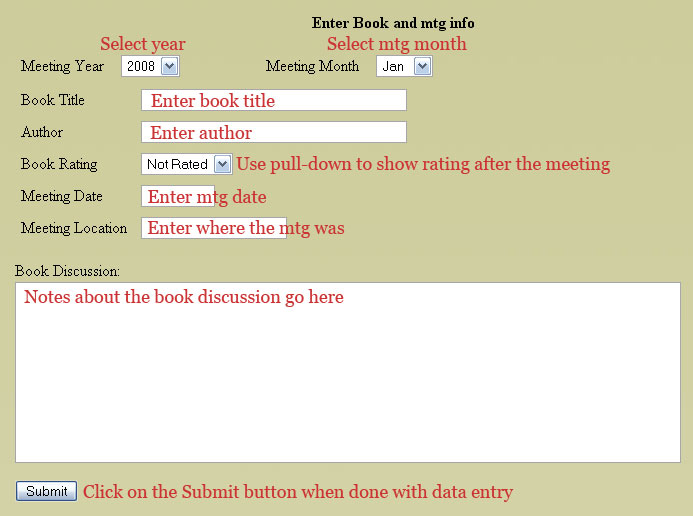
Clicking the "Add a Book" button will bring you to the following page. Book and mtg info is entered here. Typical usage is to add book info for the year at the beginning of the year and then come back later to add discussion notes and meeting data via the "Edit" link on the previous page. Usage assumes monthly meetings. Use the year and month drop-down menus to select what month the book is meant for. Everything else is self-explanatory. When done entering data, click the "Submit" button to enter the information.
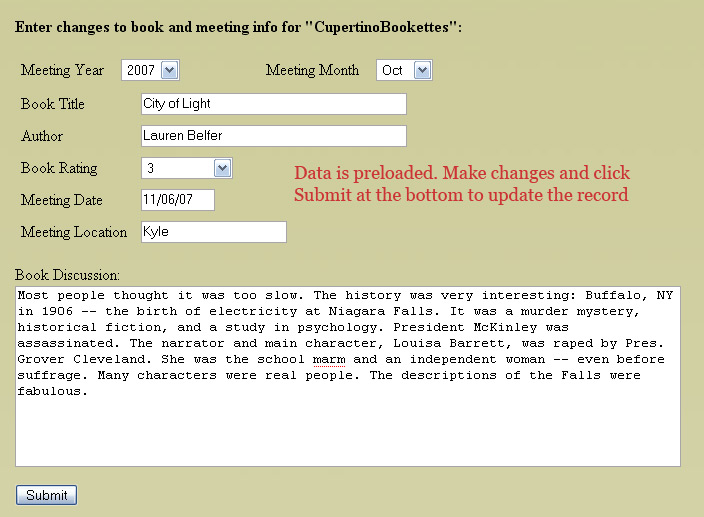
A similar screen will display if the "Edit" link is selected previous Book and Meeting Administration page but the fields that were previously filled in will have that data pre-loaded. Update as desired and click on the "Submit" button to update the information.
Administration of club links starts with a display similar to the book and meeting administration display. There is a button to add a link ("Add Club Data"). The "Edit" and "Delete" allow the link data to be updated and deleted respectively. Use the "Back to Club Page to log out of this control page and return to the main listing when you are done.

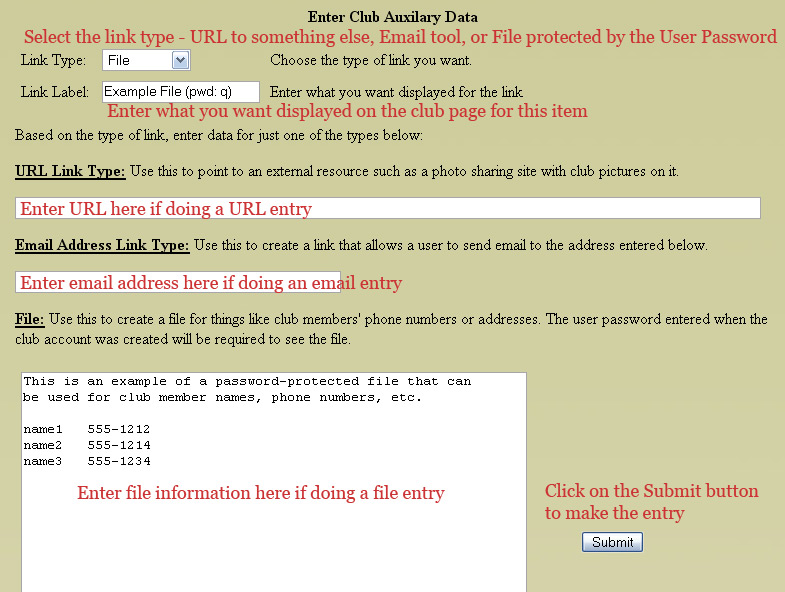
The following screen will be displayed when entering or editing club link information. Existing data will be pre-entered as shown below if the "Edit" link was used.
The first thing that needs to be done is to select the type of link with the Link Type drop-down menu. There are three choices - URL, Email, and File. Data is entered in the appropriate area based on the selection. In all cases, the next field (Link Label) should be entered. This is what will be displayed on the left side under "Club Links".
If you want to have a link with a simple URL then choose the URL option and enter data in the field under "URL Link Type". This can be used to point to pictures on Flickr or a similar photo charing site.
If you want to have a link that opens a window to send email to someone then choose the email option and enter the "To" email address in the field under "Email Address Link Type". This can be used for people to send email to the Club Administrator, club president, or anyone else whose email address is entered in the Email Address Link Type field.
The last option is to create a file. This file is protected by the User Password that was defined when the club account was established. Someone clicking on this link will need to know and enter the User Password in order to see this file. Having seperate Administrator and User passwords provides the capability to share club data with these kinds of files without giving full access of all book and account information to everyone.
Click on the "Submit" button once done entering or updating the information.